Sakura Editor practical guide
Sakura Editor settings export: a safe backup, migration, and restore workflow
When you move Sakura Editor to another PC, photographing every dialog is less reliable than identifying the settings folder and the files it actually uses. Separate sakura.ini, sakura.exe.ini, and type-specific exports, keep the source untouched, and verify the restored result with a small sample before using real documents.
Updated: 2026-08-10
Quick answer: find the settings folder before copying sakura.ini
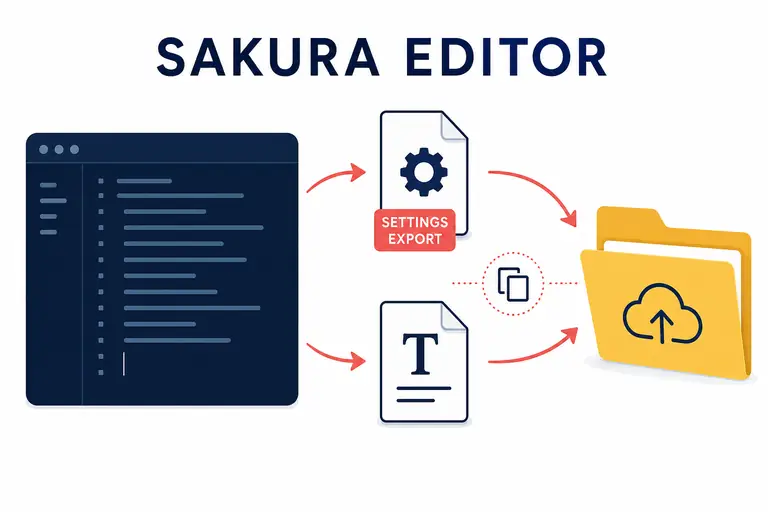
For a Sakura Editor settings export, first identify the settings folder and back up sakura.ini while the editor is closed. If user-specific settings are enabled, sakura.exe.ini controls the routing and must be treated as a separate file. When you only need one file type, open Settings > Type-specific settings list and use its export/import controls instead of replacing the entire configuration.
| Target | Role | Migration handling |
|---|---|---|
| sakura.ini | The main editor settings file | Find the active settings folder, then copy it while closed |
| sakura.exe.ini | User-specific settings and storage routing | Do not confuse it with sakura.ini; record it when applicable |
| Type-specific export | A portable file for one file type's settings | Export and import from the type-specific settings list |
| .col and related files | Color or auxiliary files referenced by settings | Copy separately and review relative paths |
What a Sakura Editor settings export actually includes
The phrase Sakura Editor settings export can mean two different jobs: backing up the whole configuration or carrying only the settings for a selected file type. The official help calls the location used by the running editor the settings folder and explains that user-specific settings can give each account its own sakura.ini. That location matters more than a guessed installation path.
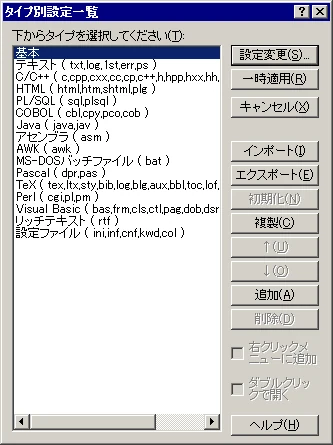
The type-specific settings list also has controls for writing the selected type's settings to a file and importing them later. If you only want to share a Markdown, C/C++, or log-file setup, exporting that type limits the blast radius compared with replacing the destination PC's complete sakura.ini.
Find the active Sakura Editor settings folder
Start with the folder the current installation really reads, rather than assuming that sakura.ini is next to the executable. When user-specific settings are enabled, the official help says that a settings-folder control can appear in the common or type-specific settings dialogs. If it is not shown, the executable folder is a candidate, but it should be confirmed with a harmless test.
Windows behavior can also expose a Virtual Store path. If a change appears only when the editor is elevated, or disappears after a normal launch, do not use elevation as a permanent repair. Check the settings folder, the user-specific configuration file, and the account's normal write access first.
- Open settingsUse Settings and open Common settings or Type-specific settings to look for the settings-folder location.
- Record sakura.iniWrite down the full path, account, environment variables, and whether Virtual Store is involved.
- Check sakura.exe.iniTreat the user-specific configuration as a separate file that controls where settings are kept.
- Run a harmless testChange one safe option, close, and reopen the editor to see which folder reflects the change.
Back up the global settings safely
Once the folder is known, copy sakura.ini to a dated folder instead of overwriting anything. A name such as sakura-settings-2026-08-10 can hold the source path, Sakura Editor version, user-specific setting choice, and a short note. That context is as important as the file itself when several PCs are involved.
On the destination PC, save the existing settings under another name before restoring anything. Keeping both files lets you compare shortcuts, encoding defaults, line endings, colors, macros, and type mappings instead of losing the new environment in one irreversible replacement.
sakura-settings-2026-08-10/
  source-path.txt
  sakura.ini
  sakura.exe.ini
notes.txtExport and import type-specific settings
For one file type, open Settings > Type-specific settings list. Select the intended type, export it to a named file, and use the same list on the destination PC to import it. The official help screenshot places Import and Export beside the type list, so choose the type before pressing either button.
A .col file or type-specific export is not necessarily a universal theme. File type, Sakura Editor version, color roles, dictionaries, and relative paths can differ between installations. Test the imported result with the same short sample before opening important work.
- Select the typeChoose the same file type used by the sample so another type is not changed by mistake.
- Export itInclude the type name and date in the filename so the file remains traceable.
- Import on the destinationSelect the matching type in the destination list, then load the saved export.
- Compare a sampleCheck colors, wrapping, tab width, completion, and newline display before adoption.
A four-step migration workflow
Moving settings between PCs is mainly a scope decision. Replacing the full sakura.ini can also carry paths, drive letters, recent-file references, or account-specific assumptions. Make the full backup first, then add only the type-specific settings and colors you actually need on the new machine.
Macros, completion dictionaries, outline rules, .col files, and other referenced assets may live outside the main settings file. A Sakura Editor window can open normally while one of those paths is missing, so make a separate inventory and test the features that matter to the workflow.
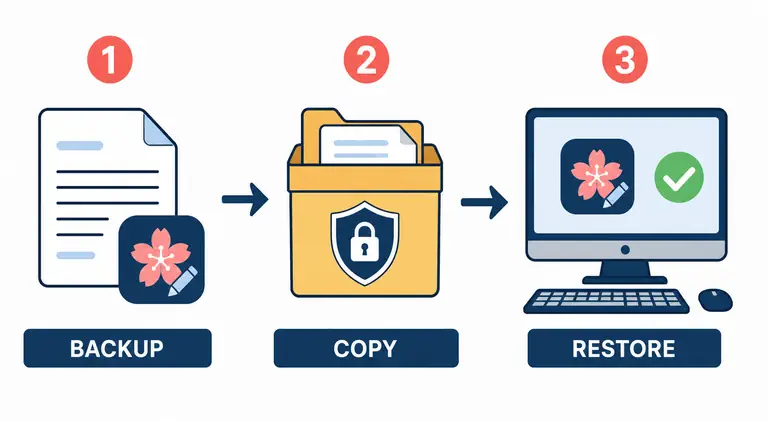
- InventoryList sakura.ini, sakura.exe.ini, type-specific exports, .col files, macros, dictionaries, and outlines that matter.
- Preserve the sourceClose the editor and keep the original settings folder as a read-only reference backup.
- Restore in stagesSave the destination configuration, then add the required type settings and supporting files.
- VerifyOpen the same sample and check display, save, search, macro, and shortcut behavior in order.
Verify the restored configuration
A settings dialog opening without an error is not enough. Open a copy of a real document and verify that the correct type-specific settings are active, that encoding and line endings remain expected, and that saving does not change the file unexpectedly. Replace paths that only existed on the old computer before accepting the migration.
For before-and-after text checks, the site's Text diff tool can compare small samples. It cannot understand Windows permissions or the meaning of a Sakura Editor setting, so use the desktop editor and a representative file for the final check.
| Check | Look for | When it fails |
|---|---|---|
| Settings folder | The destination sakura.ini location | Review user-specific settings and Virtual Store |
| Encoding and line endings | UTF-8, Shift_JIS, BOM, CRLF/LF | Reopen a copy and compare before saving |
| Type-specific settings | Colors, wrapping, tab width by extension | Select the right type and import it separately |
| Macros and dictionaries | Files and relative paths exist | Point references to the new PC's paths |
| Shortcuts | OS, IME, and other application conflicts | Compare the old assignment list with the new one |
Common mistakes and limits
The most common mistake is copying the easy-to-find installation-folder sakura.ini while the active installation uses user-specific settings or a Virtual Store copy. Another is treating sakura.exe.ini as the settings file itself, then moving only the routing file and wondering why the editor still has default values. The names are similar, but their roles are different.
When a restored feature fails, avoid replacing every file again. Check the Sakura Editor version, launch mode, settings folder, selected file type, and referenced paths one at a time. For an older configuration moving to a newer release, review the official help and release notes for behavior changes before assuming the backup is corrupt.
Frequently asked questions
Frequently asked questions
What should I copy for a Sakura Editor settings export?
Start by locating the active settings folder and backing up sakura.ini. Record sakura.exe.ini when user-specific settings are enabled. Export type-specific settings separately when needed, and check macros, dictionaries, .col files, and other referenced assets as separate items.
Are sakura.ini and sakura.exe.ini the same file?
No. sakura.ini stores Sakura Editor settings, while sakura.exe.ini is a user-specific configuration file that helps determine how settings are stored. The official help treats them as separate files.
How do I move type-specific Sakura Editor settings to another PC?
Open Settings > Type-specific settings list, select the required type, and export it. On the destination, select the same type and import the file, then compare the same sample for colors, wrapping, tab width, and completion.
Why are my settings not applied after a Sakura Editor settings export?
The destination may be reading a different settings folder, a Virtual Store copy, or a different sakura.exe.ini configuration. The selected file type or a referenced asset path may also be wrong. Check the location and type before changing permissions.
Should I overwrite the destination sakura.ini during restore?
Do not overwrite it as the first step. Save the destination configuration under a separate name, close the editor, and restore required settings in stages so you still have a rollback path.
Official references checked
- Sakura Editor official help: settings folder
- Sakura Editor official help: user-specific settings
- Sakura Editor official help: type-specific settings list
- Sakura Editor official help: type-specific settings import
- Sakura Editor official help: installation and uninstall
- Sakura Editor official GitHub releases